Seed Farm In Focus for January 2022 – Feral Farm

Our Seed Farm in Focus for the new year is:

Feral Farm

Jacksonville, OR (Zone 9a)
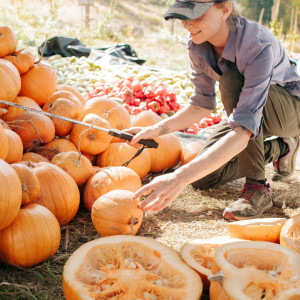
Farm Facts

  • The seed farm was established in 2017
  • 3.00 acres in production
  • 119 varieties for sale
  • Feral Farm joined the SeedWise marketplace in March of 2020.
  • The farm is located in a County that has banned GMO crops.

About the Seed Farm

Cacia Hubb owns and operates Feral Farm with the help of neighbors along Thompson Creek. Cacia fell in love with seeds twelve years ago as an intern on a permaculture farm. After her time as an intern, she left her office job to apprentice on a teaching farm on Whidbey Island in Washington. Here, she learned how to grow seed on a commercial scale. Cacia moved to Oregon in 2016 and began working with local seed and farming mentors. Meanwhile, she began work on her own seed farm. Feral Farm, established in 2017, supports itself from small scale seed contracts for local companies to large lots of 100 to 750 seeds.

Sunflowers from seed farm Feral Farm
Source: Feral Farms Facebook Page

Feral Farm’s Growing Practices

The growing practices used by Feral Farm go beyond the USDA organic standard.  They are committed to low impact and clean growing practices. For example, they strive to use preventative pest control practices rather than spraying organic-approved pesticides. In addition, the soil is farmed with minimal tillage, cover-cropping, and yearly soil testing/ammending with locally sourced inputs.

Seed Farmer Commitment to Quality Seeds

As a result of Feral Farm’s growing practices, the farm produces and harvests only the highest quality seed that is subject to testing for:

  • germination rate,
  • mold,
  • GMO contamination, etc.

The seed farm selects seeds for:

  • vigor,
  • pest and disease resistance,
  • cold and heat tolerance,
  • morphological characteristics,
  • early bolting, ect.

The seed that Feral Farm’s produces has become more regionally adapted over time. Southern Oregon has hot summers and mild winters, so the varieties thrive in this climate.
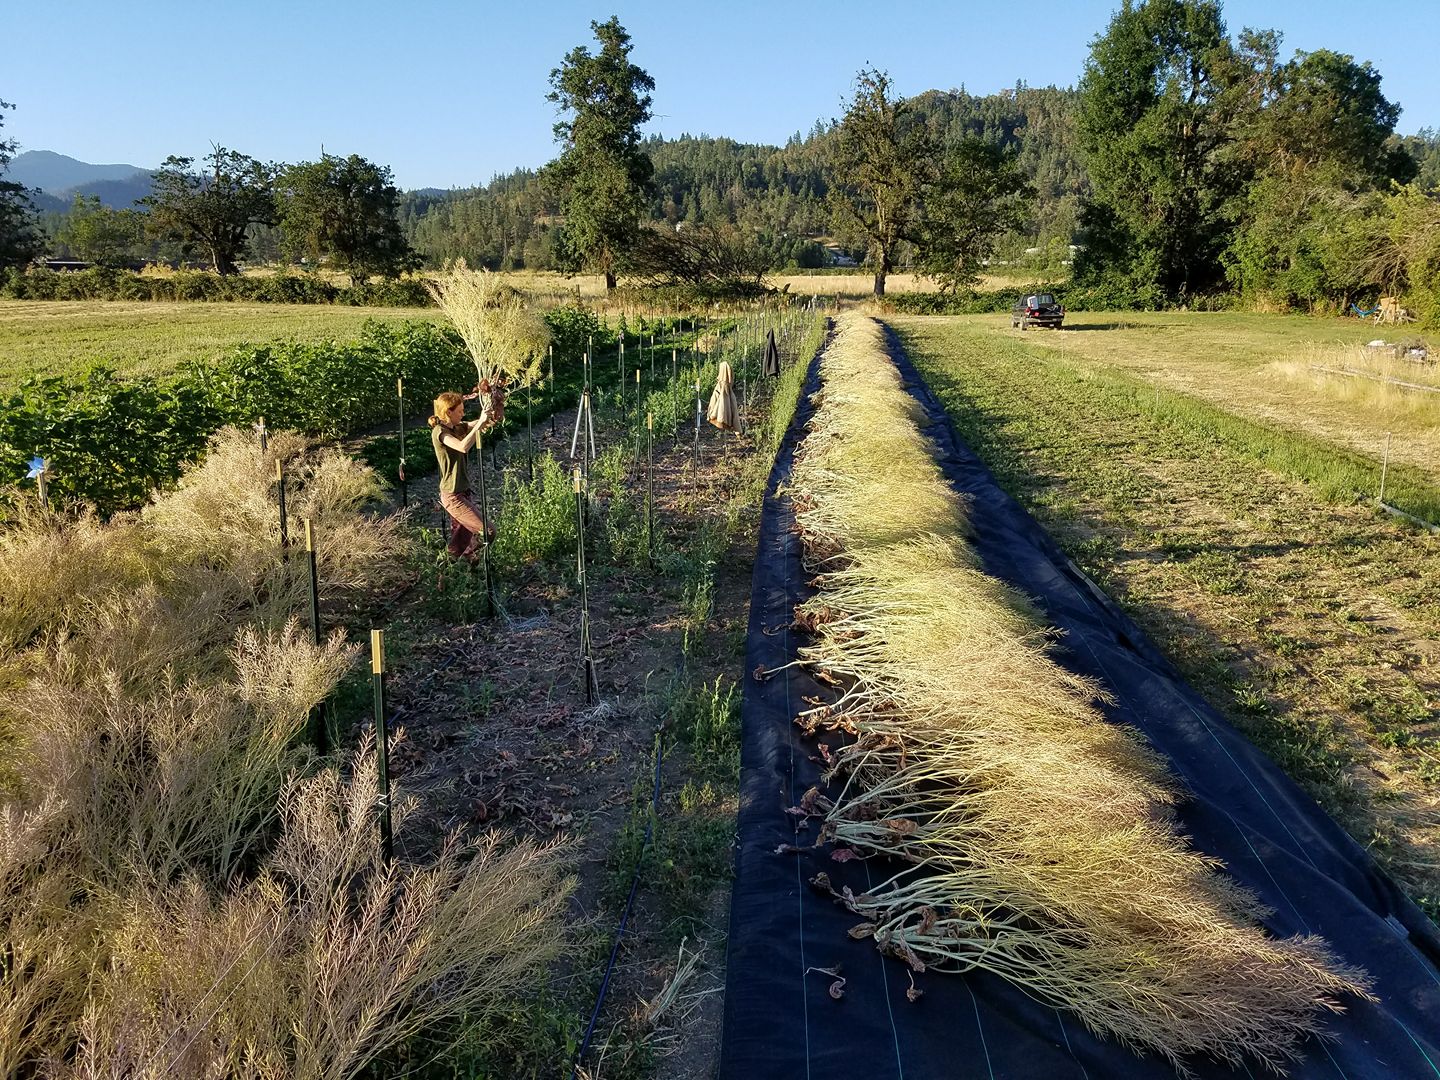
Source: Feral Farm Facebook Page

Seed Varieties Available

Some of the varieties available on SeedWise are:
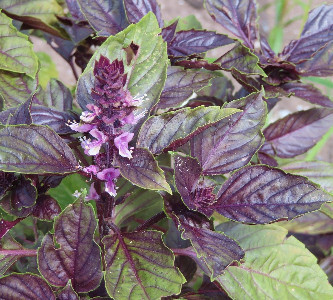
Greta Basil

Classic sweet Italian basil flavor with gorgeous variegated purple and green leaves and dark purple flowers.
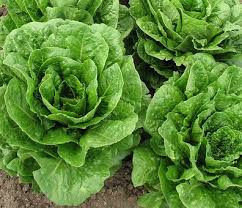


Feral Farm - Winter Wonderland Romaine Winter Wonderland Romaine

A large, dark green romaine lettuce named for its ability to thrive in cold weather, Winter Wonderland does just as well in the heat of summer. Heads are attractively uniform and slow to bolt.
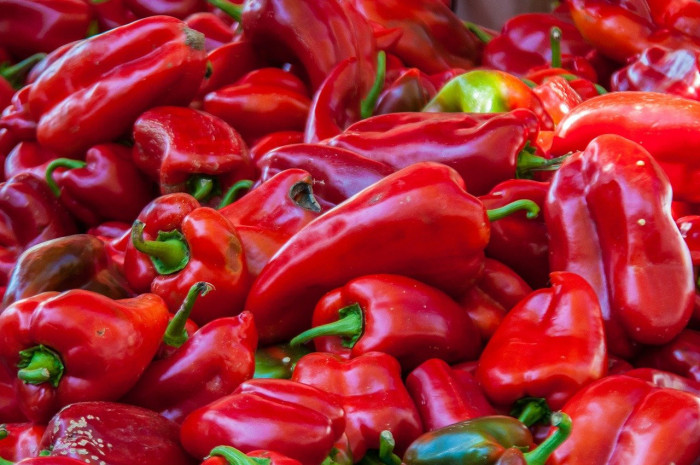


 Italia Pepper

Sweet Italian ‘corno di toro’ (bull’s horn) type pepper with 6-8″ long, medium-walled, triangular fruits that are great for roasting or snacking. Peppers have wide shoulders and a curved tip and ripen to a beautiful deep red. Plants grow to 30 inches. Early maturing at 80 days from transplant.

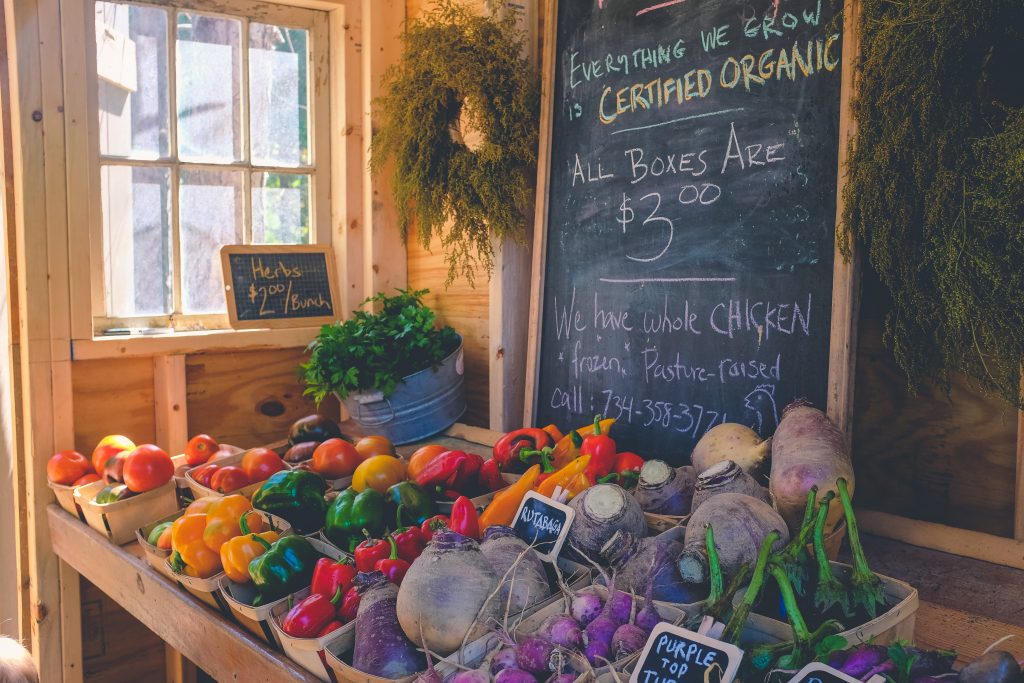
Certified Organic Seeds – Know Your Seed (3rd of 3 Part Series)

Here at SeedWise we have three ways seed farmers can describe their seeds: 1) Heirloom seeds, 2) Open-pollinated seeds, and 3) Certified organic seeds. In this post we are going to talk about certified organic seeds.

Certified Organic Produce

What are certified organic seeds?

Certified organic seeds are grown according to specific rules required by the law. In 1990, the National Organic Program (NOP) was created by Congress within the United States Department of Agriculture (USDA). For example, under the NOP, accredited third party organizations are responsible for certifying that participating farmers and businesses are meeting organic planting, growing, and harvesting standards. This level of oversight is important. As a result, home gardeners and farmers can be confident in seeds that are labeled and sold as organic.

Certified Organic Seeds Growing

How to farm organic seeds?

To receive the label for certified organic seeds, farmers must meet specific rules in three areas. These three areas are:

  1. Soil
  2. Farming practices
  3. Production practices

Soil

Firstly, the seeds must be grown in soil without using synthetic pesticides and fertilizers. For example, no substances prohibited by the USDA can be used on land where the seeds are grown for three years prior to harvest. As a result, this guarantees the soil is natural and pure.

Farming practices

Secondly, the farming methods used to care for the plants must be natural. For example, herbicides and other man-made sprays that prevent weeds and pests are not allowed. The seedlings and young plants must be cared for with natural, biologically-based products only.

Production practices

And thirdly, when plants are fully grown, they must be picked and handled organically. According to Inspired Organics, this means no artificial preservatives, colors, or flavors are allowed.

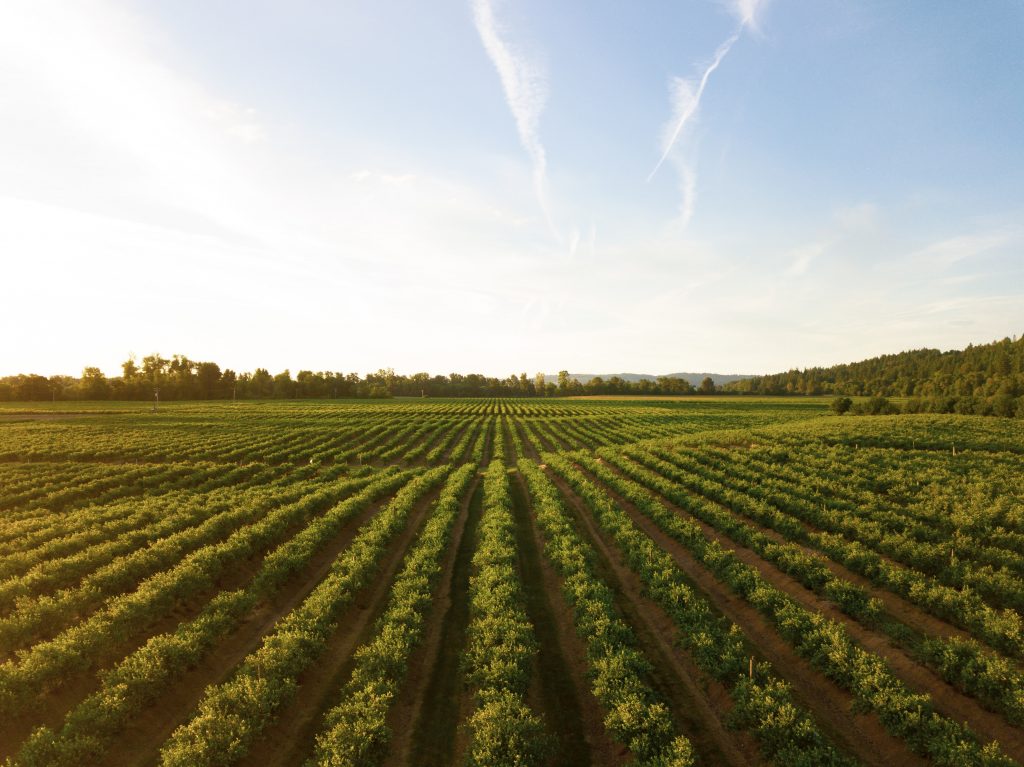
Rows of Crops

Why are certified organic seeds important?

The examples described above grow healthy vegetables and fruits, free from chemicals. 

Certified Organic seeds are healthier for humans. As a result, the rules used in organic farming are better for the planet than conventional farming. 

According to Seed Savers Exchange, certified organic seeds promote ecological balance and biodiversity. Therefore, the lack of synthetic fertilizers, pesticides, and genetically engineered seeds all help to protect the natural world. 

Certified Organic Seeds

What’s the difference between organic seeds and conventional seeds?

Seeds from a certified organic farmer are not exposed to chemicals. Because of the USDA, organic seeds are grown in a natural environment. Most importantly, these seeds are organic from planting, to growing, to harvesting!

Not all conventional seeds are sprayed with chemicals. However, there is no way of knowing if chemicals were used. This is because there are no rules for conventional seeds. 

In conclusion, buying certified organic seeds from our farmers is good for your health, and the health of the planet. Happy growing!


Open-Pollinated – Know Your Seed (2nd of 3 Part Series)

Here at SeedWise we have three ways seed farmers can use to describe their seeds: 1) Heirloom seeds, 2) Open-pollinated, and 3) Certified Organic. In this post we are going to talk about open-pollinated seeds. For more information on the other three types, check out our other posts in the links above!

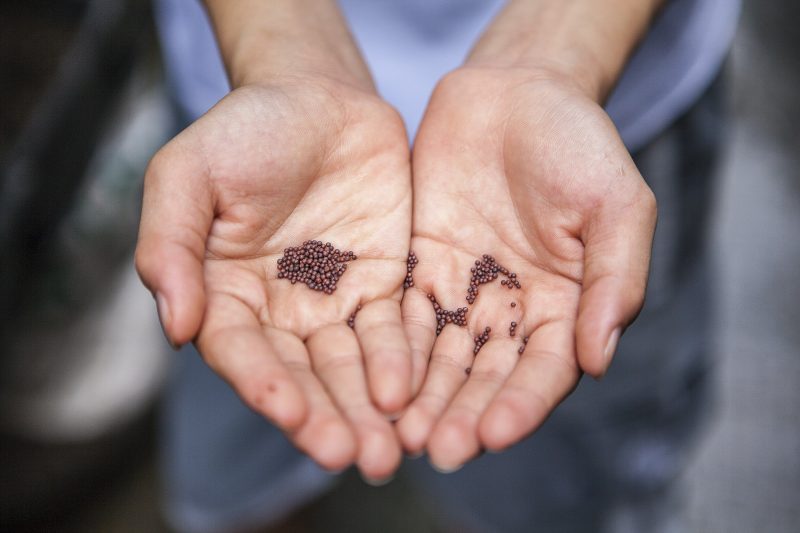
hand holding seeds

What are Open-pollinated seeds?

Open-pollinated varieties are seeds that result from pollination by insects, wind, self-pollination, or other natural forms of pollination. Open-pollinated varieties of seeds breed true or are true to type. This means that if you plant, grow and save these seeds, then plant them again, you will get the same genetic characteristics as the parent plant in future generations. Farmers can save these seeds from open-pollinated plants and do not have to purchase new seeds every year. 

What does Growing “true to seed” or “true to type” Mean?

True to seed or true to type refers to plants whose seed will grow the same type of plant as the original plant or parent plant. With care to prevent cross-pollination, open-pollinated plants will almost always grow true to seed.
What does Cross-pollination Mean?

Cross-pollination refers to a plant that can be pollinated by another plant of a different variety, but the same species. For example, if you are growing “Brandywine” tomatoes and the Brandywine cross pollinates with a nearby “Green Zebra” tomato, the resulting seeds will be an interesting variety of tomatoes that has traits from both plants. However, pollen from a daisy or an apple tree can not cross-pollinate with a rose to create new rose seeds.

In addition, when farmers produce new seed varieties by cross-pollinating, they save the seeds from the most desirable plants, or the plants with the most desirable traits. Seed saved from cross-pollination will not always grow true to type. 

What does Open-Pollinated Mean to the Gardner?

The big draw for open-pollinated seeds is that they can be saved from mature plants and re-sown every year. These seeds will grow into a plant with the same traits you know and love. If you grow a variety you enjoy or that does well in your garden, you can save seeds from the same plant to plant next season! It saves you money and time in the long run. Also, it helps you to maintain your plants and future plants.

Keep in mind that both the wind and insects will pollinate different open-pollinated plants. Therefore, with some common home garden plants, notably squash and pumpkins, saving seed can be a gamble. Remember, unless different varieties are separated by specified distances, they may exchange pollen or “cross-pollinate” each other. Check out all of our open-pollinated varieties! You can talk with the farmer about  any seed questions you have!

FDA Chemists Finding Glyphosate in Food – Organic Seeds for the Win!

Breaking news from The Guardian last month, FDA (Food and Drug Administration) internal emails show that US government scientist have detected weed-killer linked to cancer in commonly consumed foods. When I say common I mean honey, crackers, granola, cornmeal, oatmeal, baby food, and corn. The FDA just this year began testing American food for traces of glyphosate. Glyphosate is a chemical that has been used for over 40 years in food production. Glyphosate is the main ingredient in Monsanto’s popular Roundup brand, which was labeled as a carcinogen by the International Agency for Research on Cancer (IARC) in 2015. This article will discuss the problems with Glyphosate and the benefits of organic seeds.


So, maybe you just read that and now you’re freaking out a little bit. I did. I mean, I don’t think anyone really wants to eat food that can cause cancer. So, how can we avoid eating foods with glyphosate in them? It’s a good bet that plants exposed to Roundup will have glyphosate in them and so will their seeds. I can argue that the corn we eat is technically a seed and they’ve found the glyphosate in corn. But, there is no research currently looking at seeds. Now that we all are aware of this terrible news, what can we do about it?


Well, good news, there are a few different ways farmers grow seeds. There’s organic, conventional, and now, thanks to good ol’ technology, genetically modified organisms (GMOs). We’re going to cover all three.


What is GMO Seeds?

First, we know GMO seeds are not available to the public for gardening. However, understanding what GMO’s are is still important in understanding how we currently produce food. So, let’s identify what we mean by GMO. It’s true, throughout history, humans have selectively grown and bred plants. I’m sure, in high school, you were taught the fundamentals of genetics. Gregor Mendel, the “Father of Modern Genetics,” crossbred pea plants with different characteristics. The difference between selectively growing the plants of the past and current GMO production is simple. GMO plants cannot, ever, be produced using natural methods.

 How do we make GMO’s?

GMO plants are created by inserting genes, sometimes from other species, into the genetic DNA of a plant. They are developed in a lab, at the cellular level. According to the Genetic Literacy Project, the Big Six (Bayer, BASF, Dow, DuPont, Monsanto, and Syngenta), use the term “innate” to reference genetically modified varieties. These varieties that do not contain genetic material from other species, but use other genetic modifiers to produce the seed. Again, these seeds are still only and can ever only be produced in a lab [1]. By the way, together, these companies account for a little more than half the sales of seeds, pesticides, and fertilizers around the world [2].
 

What is Conventional Seeds?

Conventional seeds are available pretty much everywhere. The seeds you find in your grocery store or hardware store, are conventional seeds unless labeled organic. Conventional really means ‘unspecified.’ Unspecified means the seed producers do not have to disclose what chemicals, process or growing methods were used to produce the seed [3]. These seeds are sold by large corporations, usually the Big Six. Conventional seed production is one of the most chemically intensive types of agriculture. This is because the seed crops themselves are not meant for human consumption. Therefore, pesticide regulations are less strict for these crops allowing for higher doses of harmful chemicals, like the lovely aforementioned Roundup (You caught the sarcasm right?) [4].


What is Organic Seeds?

Now let’s look at what we mean by organic. Organic seed is seed that is produced by organic gardening/farming methods and processes as defined by the USDA’s National Organic program (for the USA) or other organic certifiers. This process prohibits the use of synthetic fertilizer and pesticides, as well as genetically engineered seeds and materials [5]. Basically, organic seeds means the seeds are grown and produced much more naturally than conventional or GMO seeds. This includes the “old school” ways of crossbreeding plants to produce organic seeds with desired traits, just like our Father of Modern Genetics.


So, why should we care again?

Well, here are 3 big reasons why we should care if we grow seeds or eat produce made from organic seeds as opposed to GMO or conventional seeds.

Reason 1

First, and this is the BIG ONE, organic seed farmers cannot to use synthetic herbicides or fertilizer when growing their seeds. This means, organic seeds will NOT have glyphosate in them. Also, as long as organic food is grown with organic seeds, no glyphosate can be in those foods either. Conventional seed on the other hand can be blasted with as much herbicide as the seed farmer wants/needs. Unlike their organic counterparts, conventional seeds are dripping in synthetic pesticides and herbicides (like glyphosate). And what is worse, evidence from independent, FDA-registered food testing laboratories have found high levels of herbicide glyphosate in human urine, breast milk and blood [8]. Cool, I’m sure glyphosate is a great thing for me to give to my infant. Score one for organic! So, by buying organic seeds and growing them or buying organic food, you can avoid getting cancer or giving your children cancer just from eating food. You’re welcome. 

Reason 2

Second, GMO’s are not a good choice, organic is better by far and here’s why. The FDA does NOT test whether GMOs are safe nor does the FDA require independent pre-market testing for GMOs. This means, literally, that the Big Six submit their own studies as proof of GMOs safety. They don’t even have to submit the full and complete information about these studies either [7]. The issue here is that there are no checks to make sure that the information they are providing is accurate. Anyone remember those cigarette ads claiming tobacco is good for your health? Literally, no testing is required for the safety of genetically modified or engineered seeds and plants. The result, the American people have become one big science experiment.

Reason 3

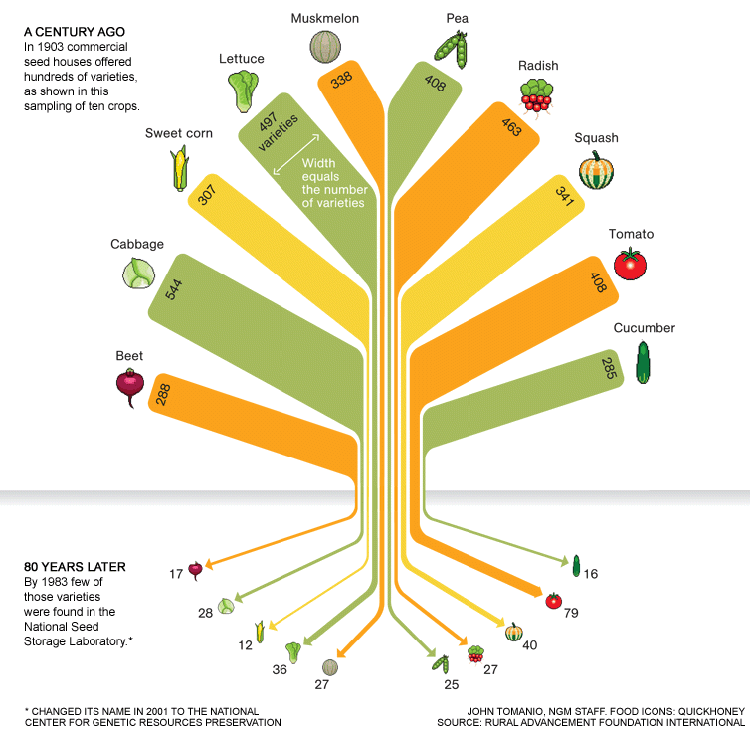
Third, is seed diversity. Now this isn’t something that you would necessarily relate to conventional, GMO or organic seed arguments. However it is related and it’s one of the main reasons we created SeedWise as an organic and non-gmo seed marketplace. Seed diversity is critical to our ability to provide enough food for the planet because individual varietals that are monocropped (meaning the same plant is grown in large quantities over many acres) and overly popular can get easily wiped out by disease and climate change. In addition, GMO seeds are the intellectual property of the companies that sell them, requiring farmers to purchase new seed every year rather than plant the seeds the plants naturally produce [10]. The National Geographic put out this infographic by John Tomanio, providing a stark visual for the loss of seed variety. Between 1903 and 1983, the United States alone lost 83% of the unique seed strands from the most popular produce.


A little more about the FDA and Glyphosate

So, just to make you a little bit more angry, the United States Government Accountability Office (GOA) wrote a report in 2014. The report states from 1970 to 2007, hundreds of millions of pounds of pesticides were applied to U.S. food crops. First paragraph of that report is worth a read. FDA emails show that one of their lab’s found glyphosate in numerous samples of honey and oatmeal products. After which, the FDA temporarily suspended testing and reassigned the lab to other programs. The US Department of Agriculture, set to start its own testing of foods for glyphosate residue in 2017, dropped the plan. The FDA has a “legal limit” for glyphosate in food. Cool. Thank you federal government for letting lobbyists make it OK for me to ingest herbicide. One of the corn samples the FDA was testing found glyphosate significantly over the legal limit set by the EPA. The emails show that the chemists asked what to do. The FDA responded by saying that corn was not an “official sample” and will be ignored.


If you’re not convinced about our arguments, we invite you to check out our sources, dig deeper, and inform yourself. If you ARE convinced, we invite you to review the seeds for sale on our marketplace! Check out the farmers here at SeedWise who lovingly and carefully grow organic seeds and non-gmo seeds. We’ve got a wonderfully diverse selection from across the United States and Canada. Make the right choice to protect your health and the health of your family. Buy organic seeds and non-gmo seeds from SeedWise. Know your farmer, know your seed.


Heirloom Seeds – Know Your Seed (1st of 3 Part Series)

Here at SeedWise we have three ways seed farmers use to describe their seeds – 1) Heirloom seeds, 2) Open-pollinated seeds, and 3) Certified Organic seeds. In this post we are going to talk about Heirloom Seeds.

I’m sure you’re wondering, what exactly is an heirloom seed? Why should you buy them? Why should you grow them?

Tomatoes

Heirloom Seed History

These seeds are pretty cool because of their history. Heirloom seeds are what we consider our are old-time varieties, saved and handed down through multiple generations of families. The term “heirloom” defines a seed that has a documented heritage of passing the seed down from generation to generation within a family or community. Due to this ability, the variety of vegetable, fruit, or flower seed must be:

  1. Open pollinated 
  2. Breed true

“Open pollinated” means seeds pollinated by insects, birds, wind or other natural means. The term “breed true” means that the seeds can retain their original traits from one generation to the next. As a result of these traits, heirlooms have lasted a very long time.

Heirloom Seeds Value

The value of an heirloom seed could lie in its flavor, productivity, hardiness or adaptability. Heirlooms are grown, saved, and passed down for hundreds of years, hence their value has been realized by many generations for an extremely long time. So the key thing here is, these seeds allow you to grow plants that you can harvest for their seeds and are true to their traits.  As a result, you can collect seeds from one year that will produce plants with the characteristics of the plant from the previous year. This is great because it is how generations of people have shared heirloom seeds.

According to EcoWatch, heirloom fruits and vegetables are the better seed choice to grow because they are generally known to produce better taste and flavor. Heirloom seeds are more nutritious and less expensive over the long haul.

So, why buy and grow heirloom seeds? Apart from the reasons already listed, heirloom seeds, most of all, constitute a critical part of our agricultural heritage and help ensure genetic diversity of plant species. SeedWise currently boasts a large selection of vegetable, fruit, and flower heirloom seeds. Check out all of our heirloom seed varieties and talk with the farmer about the history of the seed, I’m sure it’s a great one!

Join humanities agricultural heritage and grow some heirloom seeds!

All Garlic Varieties and Cultivars listed

Here’s a list of all (at least 90% of them) of the garlic cultivars available today.

They’re broken down first into Hardneck and Softneck. From there they are broken down into the 10 varieties.

If you have any questions, or additions to the list, let me know in the comments below!

Without further ado, onto the list!


Hardneck Garlic Varieties

Purple Stripe Garlic Cultivars

Belarus
Chesnok Red
Persian Star


Marbled Purple Stripe Garlic Cultivars

Bogatyr
Brown Tempest
Gourmet Red
Metechi
Pskem
Siberian

Glazed Purple Stripe Garlic Cultivars

Purple Glazer


Rocambole Garlic Cultivars

Amish Rocambole
Bavarian
Caretaker
German Giant
German Red
Italian Easy Peel
Korean Red Hot

Paw Paw
Purple Italian
Russian Red
Slovenian
Spanish Roja
Ukraine


Porcelain Garlic Cultivars

Polish Jenn
Polish Hardneck
Georgian Crystal
Georgian Fire
German Extra Hardy
German White
Leah 99
Leningrad
Northern White
Music
Romanian Red
Rosewood
Stull
Zemo


Creole Garlic Cultivars

Ajo Rojo
Germinador
Burgundy
Creole Red
Cuban Purple
Rose de Lautrec


Asiatic Garlic Cultivars

Asian Tempest
Japanese
Killarney Red
Korean Red
Sonoran
Thermadrone

Turban Garlic Cultivars

China Dawn
Chinese Purple
Maiskij
Red Janice
Shandong
Shilla
Tzan
Xian


Softneck Garlic Varieties

Silverskin Garlic Cultivars

Idaho Silver
Mild French
Nootka Rose
S&H Silverskin
Silver Rose
Silverwhite

Artichoke Garlic Cultivars

Applegate
California Early
Early Red Italian
Inchelium Red
Italian Late
Italian Purple
Lorz Italian
Polish Softneck
Polish White
Red Toch
Rogue River Red
Siciliano
Simoneti
Susanville
Transylvanian

History of Garlic

There are two distinct types of garlic. Hardnecks and Softnecks.  The hardnecks were the originals, derived from their wild predeccessors. The softnecks have developed over the years through a process of breeding hardneck varieties, selecting the ones that have softneck traits (no scapes, several small cloves per head, and mature more quickly) replanting those, and gradually moving towards a softneck variety.

All garlic is classified as Allium Sativum. From there there, the two subclasses are – Hardneck, (Ophioscorodon, Ophios for short) and  Softneck (Sativum).

As of 2003, the consensus is that there are 10 distinct varieties of garlic.  5 disctinctly hardneck, 3 ambiguous hardnecks that often produce softneck kin, and 2 varieties of softneck. (Listed below)

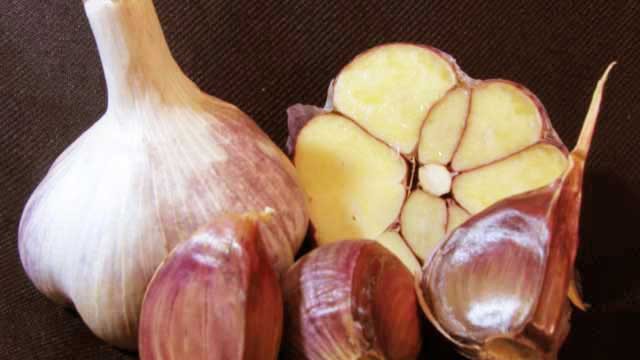
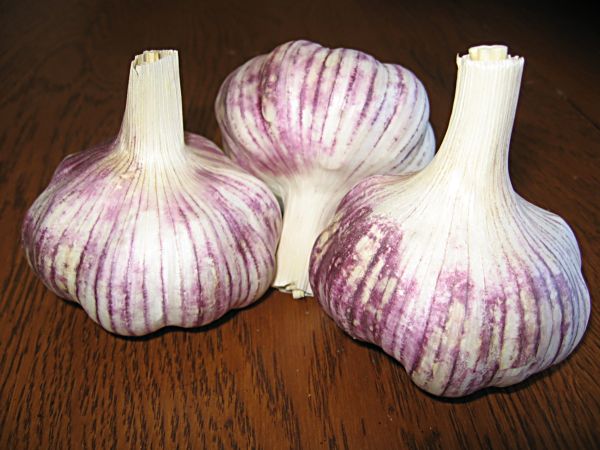
Hardneck - Marbled Purple Stripe Garlic
Hardneck – Marbled Purple Stripe Garlic

Hardneck Garlic Varieties  (Allium Sativum Ophioscorodon)

1. Purple Stripe

2. Marbled Purple Stripe

3. Glazed Purple Stripe

4. Rocambole

5. Porcelain

Ambiguous Hardneck- Asiatic Garlic


Ambiguous Hardnecks (Allium Sativum Ophioscorodon)

6. Creole

7. Asiatic

8. Turban

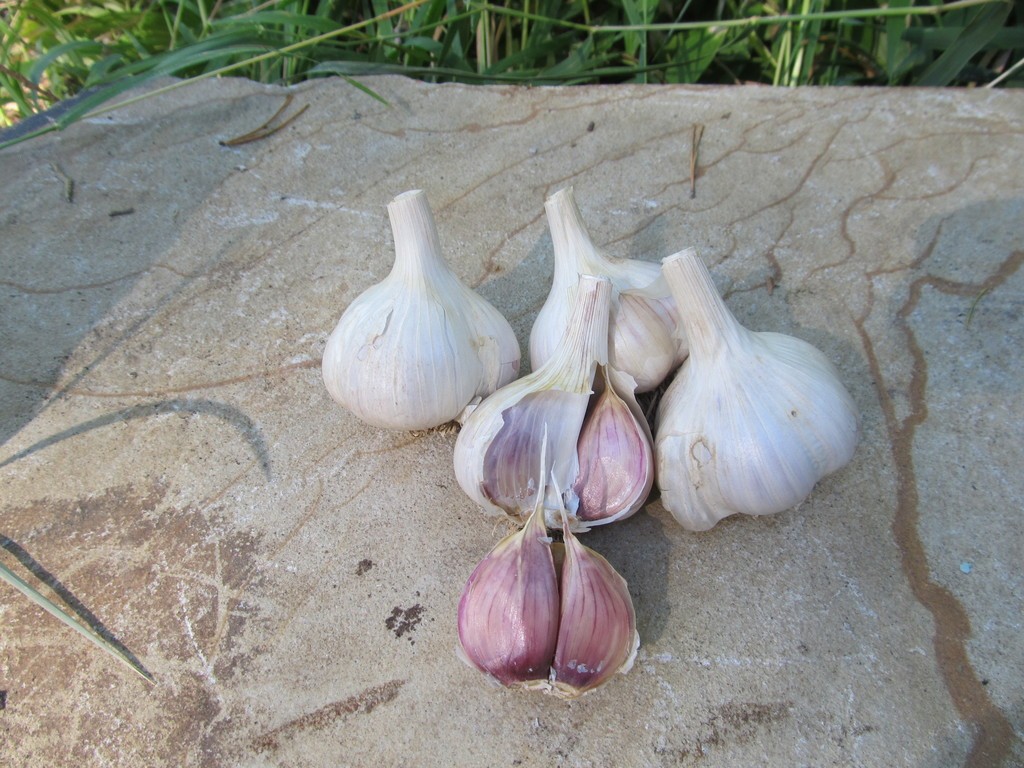
Softneck - Silverskin Garlic (cultivar - Ajo Morado)
Softneck – Silverskin Garlic (cultivar – Ajo Morado)

Softneck Varieties (Allium Sativum Sativum)

9. Silverskin

10. Artichoke


History

This story was first told by Bob Anderson of Gourmet Garlic Gardens. 

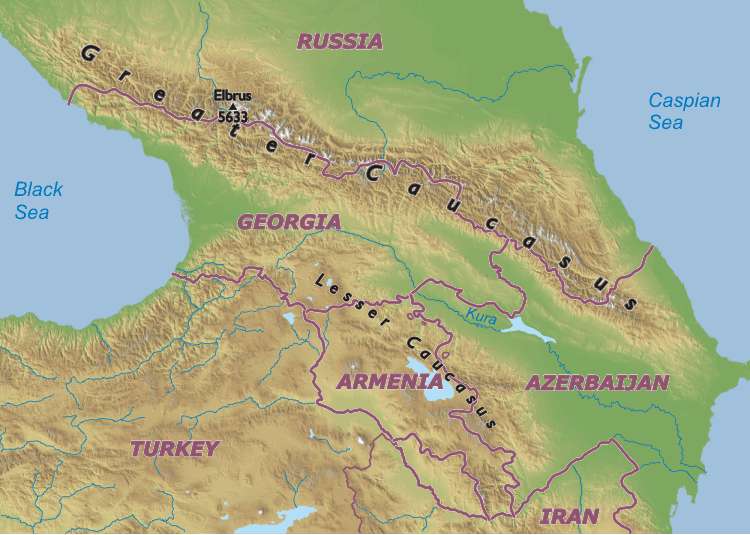
As the story goes, every single garlic cultivar (there are hundreds) evolved from the ten varieties listed above. And all of the 10 came from the Caucasus Mountains between the black sea and the Caspian sea.

Caucasus Mountains Map
Caucasus Mountains Map – From freeworldmaps.net

Over time, each cultivar has developed their unique characteristics by encountering different growing conditions including:

  • Soil types
  • Rainfall
  • Temperature
  • Altitude
  • Length and severity of winter

Arrival in the US

Up until 1989, the majority of the garlic in the world resided in Europe and specifically originated from the Caucasus mountain range

 which divides modern day Russia and Georgia.

 When the scant few varieties did make it into the United States, they usually came  via Polish, German, and Italian immigrants.

The USDA knew that there was a treasure trove full of garlic varieties waiting for them in the Caucusus Mountains. They consistently asked the Soviets for permission to come get some. But, as it turns out, along with harboring the worlds most prized garlics, the Caucusus Mountains, were also home to a few of Russia’s missile bases and their spaceport.  Not exactly a place that our good Soviet friends were keen on letting us “come get some garlic.”

In 1989, as the Soviet Union disintegrated, the USDA was finally invited to collect the garlic varieties. So off our government agents went, along with an armed Soviet convoy to get the prized garlic. Only allowed to travel at night (to keep from seeing military secrets, or the lack thereof),  they went from village to village along the Silk Road. In each village they purchased every variety they could find and subsequently named many of them based on the village they were purchased.

Upon arriving to the US, armed to the teeth with their precious garlic, our USDA heroes worked a deal with a handful of growers to grow out these new varieties. The basic gist of the deal was, the growers would grow out a field and split the bounty with the USDA.

Over the next few years, the growers continued to replant their varieties and traded amongst each other. And this way, slowly but surely, the North American supply of garlic has grown.

25 years later, we still have a shortage in the garlic market. Many of the garlic growers will not accept any orders until after their garlic is harvested, cured, and ready for sale in late August. When they finally do open their doors to sell their garlic, it is not uncommon to sell out within two weeks, and a few even sell out under 48 hours!

If you’re interested in buying  some seed garlic this season, check out what our growers have before they  sell out.

Buy Organic Seed Garlic

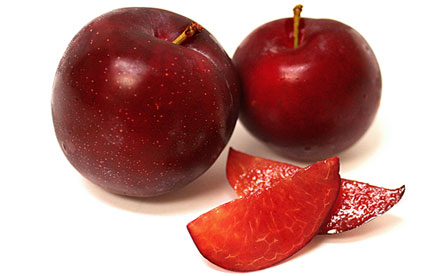
Santa Rosa Plum Tree Profile

Santa Rosa Plum

History of the Santa Rosa Plum

Plums themselves date back to the age of the Roman Empire where an abundance of 300 different varieties were grown. Meanwhile, in China, and then later Japan, plums were growing in popularity.

In the late 1800s plums started making their way into the US from both the eastern and western seaboard.

This beauty of a plum, is a descendant of the asian plums.

A descendant yes, but it took a bit of plant breeding mastery to produce this masterpiece.

Enter, the master himself, Luther Burbank.

A brief background on this superhero of a plant breeder. During his life (1849-1926)  Burbank developed more than 800 varieties of plants, including 113 varieties of prunes and plums, 10 berry varieties, 50 varieties of lilies, and of course the Freestone peach. Soon, I’ll write up a profile on Luther Burbank, because he is kind of, (no kind of about it) my idol.

Back to our treasure of a plum.

The exact lineage is unclear. As it’s known now, the Santa Rosa Plum tree has roots from wild plums in Japan (which originally came from China).  It is said to have been a “complex hybrid” that Burbank developed. If any of you reading this, know more about the parents involved, I would love to know more, and share it with the rest of you.

Soon after Burbank developed this variety, it became a huge favorite, and quickly spread throughout the country.

The name came from it’s origin in Santa Rosa, California.  A place that Burbank himself declared “God’s gift to fruit growers.”

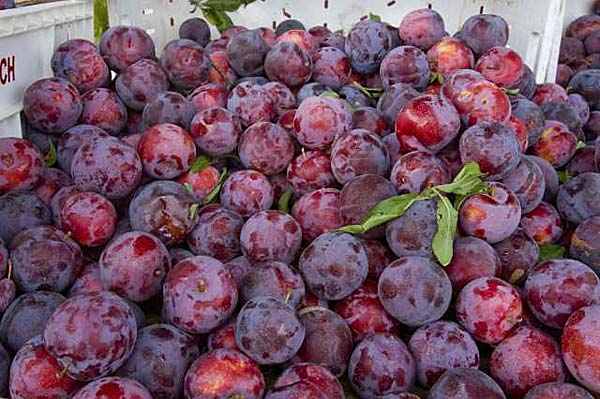
Santa Rosa Plums

The key traits that Burbank sought out, and consequently, everyone fell in love with are:

  • Superior Taste
  • Resistant to disease
  • Abundant Yield
  • Transports well
  • Keeps a long shelf life

About the fruit

This is one of the most popular varieties of plum that you’ll see growing in backyards and available for purchase from farmer’s market growers. People love it because of it’s sweet, juicy flesh, and its versatility in eating right off the tree, or harvesting a few days early to be baked or canned.

Popular uses include: jams, jellies, preserves, puddings, and sauces. What’s yours?

I have a tree at my place and can’t help eating less than five every time I visit the tree. They just taste like summer. So good.

The Santa Rosa Plum tree grows well in the USDA Hardiness Zones 5 to 9 where hard frosts are not a big threat. It usually reaches a size of about a 12 foot globe.

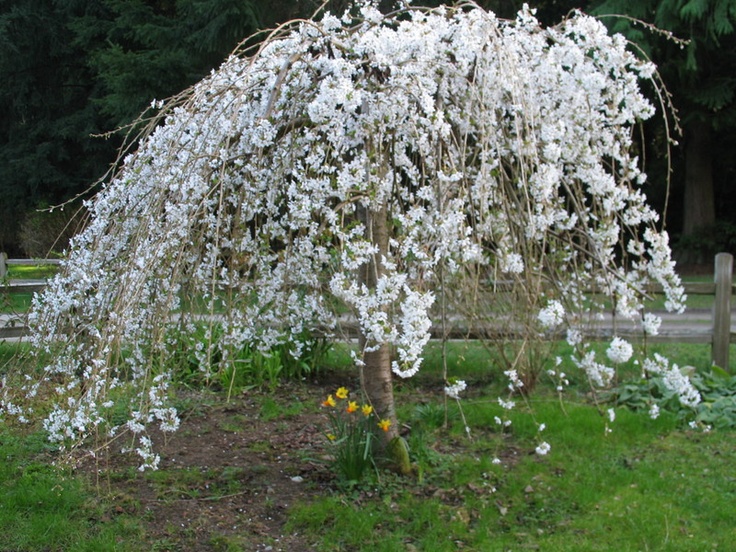
Santa Rosa Plum in bloom

During the winter,  it needs about 400 chill hours (temps around 45 degrees or lower) and works well as a pollinator of others in the flowering period (usually late May) because it produces an abundance of wonderfully fragrant pollen.

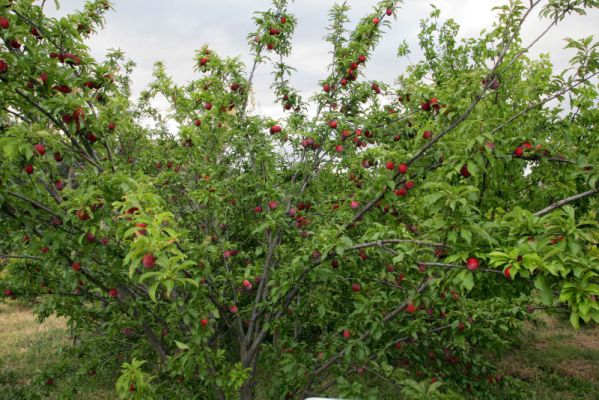
In the third to fifth year, the tree starts bearing fruit, and that’s when the fun begins!

Santa Rosa Plum Tree bearing fruit

Specific Growing Hints

Santa Rosa plum trees love to be rooted in well-drained soil, and bask in full sun. Just like most of the other Japanese plums, these require another suitable plum tree to pollinate it and set fruit. I personally don’t know if it needs to be another Japanese Plum tree to pollinate it, or if it just needs to be a plum. If you’re curious, let me know in the comments below and I’ll figure it out for you.

If you’re ready to bring a Santa Rosa Plum Tree into your life, click the link below to buy a tree from one of our growers on SeedWise.

Buy a Santa Rosa Plum Tree

What to Plant in Your Winter Vegetable Garden (Pacific Northwest edition)

A simple guide of what to get planted in the summer for your fall/winter garden if you live in the Pacific Northwest. You can also use this guide if you live anywhere else, just keep in mind this is tailored to a winter that doesn’t get colder than 20F.

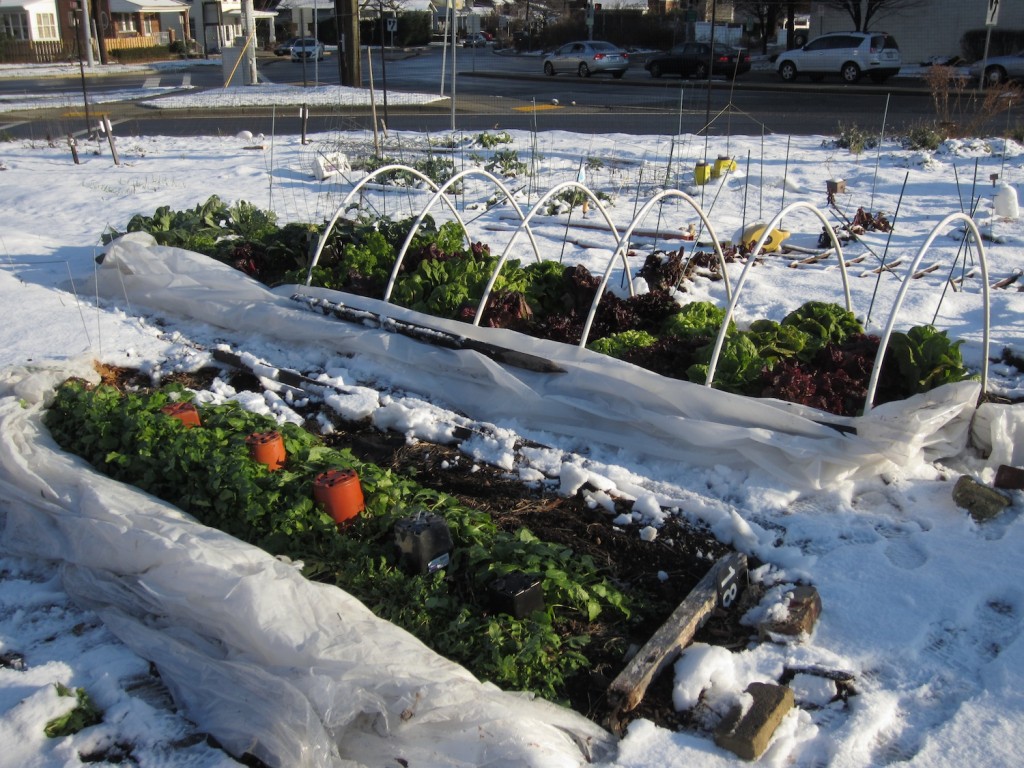
Winter Garden Low tunnel (montgomeryvictorygardens.com)
Winter Garden with Low Tunnels pulled back for photo purposes (Photo courtesy of montgomeryvictorygardens.com)

Season Extenders

Season extenders are your best friend for the fall and winter garden.

What exactly is a season extender?

Simply put, it’s a method of protecting your crops from the colder, wetter weather.

A couple common Season Extenders:

  • Cloches
  • Low tunnels
  • High tunnels
  • Greenhouses


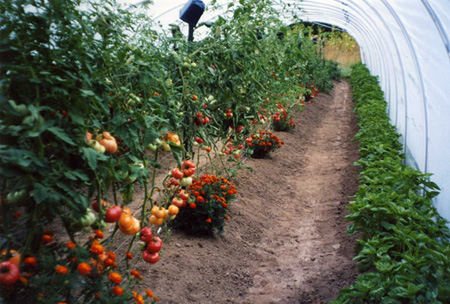
Tomatoes in a HoopHouse (Photo courtesy of pondplantgirl.blogspot.com)

If you have the space, low tunnels, are often the cheapest and easiest ways to keep your crops through the winter.

Here’s a quick video explaining everything you need to know about setting up a low tunnel.

Explanation of Hoop Houses/Low Tunnels

Winter Garden
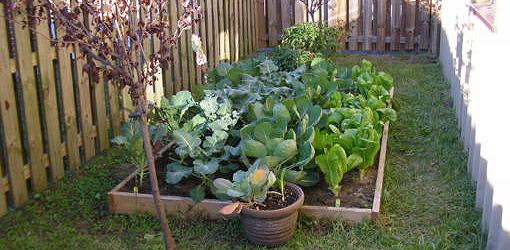
Winter Garden (Photo couresy of todayshomeowner.com)

Crops to Plant in your Winter Vegetable Garden

Definitions for the guide below:

Direct Seed – Plant the seed directly into the soil.

Transplant – Plant the seed first in a seeding tray, water and grow it for 2-4 weeks, then transplant it into your garden.

Format 

Crop Name (Planting Date, Planting Method)

Recommended Varieties: The varieties that do best through the winter

The Crops

Beets (July 15, Direct Seed)

Recommended Varieties: winterkeeper, albina verduna,

Broccoli (June – July 15, Direct Seed or Transplant)

Recommended Varieties: Purple Sprouting, White sprouting late, Rudolph

Brussels Sprouts (Mid July , Transplant)

Jade Cross E, Lunet, Oliver, Red Rubine

Cabbage (June, Direct Seed or Transplant)

Danish Ballhead, Excel, Gloria, Melissa, Zerlina

Carrot (Mid-July, Direct Seed)

Bolero, Merida, Royal Chantenay

Cauliflower (mid-July, Direct Seed)

Snow Crown, Snow Ball

Celeriac (June, Transplant)

Recommended Varieties: Celeriac, Diamant

Celery (June + July,  Transplant)

 Recommended Varieties:  Utah Improved. Needs some protection

Chives (July, Transplant)

Recommended Variety: Nelly

Collard (July, Direct Seed)

Recommended Varieties: Champion

Endive (July 15, Direct Seed)

Recommended Varieties: President, Perfect. Best under cloche

Fava Bean (September, Direct Seed)

Recommended Varieties: Aquadulce, sweet lorane.

Fennel (July, Direct Seed)

Recommended Varieties: Florence, Orion, Solaris

Garlic (Mid July to August, plant bulbs)

Recommended Varieties: Persian Star, Romanian Red

Horseradish (July, Direct Seed)

Recommended Varieties: New Bohemia, Maliner Kren

Jerusalem Artichoke (July, Direct Seed)

Recommended Varieties: Stampede

Kohlrabi (July + August, Transplant or Direct Seed)

Recommended Varieties: Grand Duke, Kongo, Winner

Leeks (July, Direct seed)

Recommended Varieties: Durabel, Alaska, Goliath, Siberia, Mekwina

Lettuce, leaf (August, Direct Seed)

Recommended Varieties: Winter Density, Oak Leaf, Top Gun, Merveille des Quatre Saisons (continuity), Cloche

Mustard (August + September, Direct Seed)

Recommended Varieties: Mizuna

Onions (July, Direct seed or transplant)

Bulbs: Walla Walla, Keepwell, Hi-ball, Buffalo, Red Cross.

Bulbets & Tops: Egyptian Top, Multiplier.

Parsley (July 15, Direct Seed)

Recommended Varieties: Italian plain leaf.

Parsnip (June, Direct Seed)

Recommended Varieties: Cobham Marrow, Gladiator

Radishes (August + September, Direct seed)

Recommended Varieties: White long, China Rose

Rutabaga (July, Direct Seed)

Recommended Varieties: Marian, American Purple Top, Improved Laurentian

Scallions (July, Direct Seed)

Recommended Varieties: Hardy White bunching

Spinach (August, Direct Seed)

Recommended Varieties: Bloomsdale Savoy, Tyee, Skookum, Olympia, Hybrid 424, Melody, Wolter Baker, St. Helens

Turnip (August, Direct Seed)

Recommended Varieties: Purple Top White Globe.

Swiss Chard  (June + July, Direct Seed)

Recommended Varieties: Perpetual, Dorat, Ruby Red

Spinach (August, Direct Seed)

Recommended Varieties: Red Kitten, Racoon, Carmel

Kale (August, Direct Seed)

Recommended Varieties: Winter Red, Winterbor, Siberian


Any Questions?

If you have any questions about planting your fall/winter garden in the Pacific Northwest, leave them in the comments below, and I’ll do my best to answer them for you!

Garlic Growing Guide

You’re ready to grow your own garlic, but don’t know quite where to begin?

Have no fear, garlic is a very forgiving crop and easy to harvest a bounty to be shared with your friends.  Below we’ve outlined the steps to grow, harvest, and store your own garlic, all the while trying to withhold as many of the bad jokes as we could…

I – When to Plant Garlic

The ideal time to plant your garlic is right after the first frost of the fall.  Seems weird, I know, but this way your garlic can get established for the long winter ahead.

When planting garlic, instead of planting seed, you’ll plant the actual garlic cloves. This is very similar to planting seed potatoes instead of potato seed.

One more thing to remember about the cloves your plant, the larger the clove, the larger the bulb you’ll harvest.

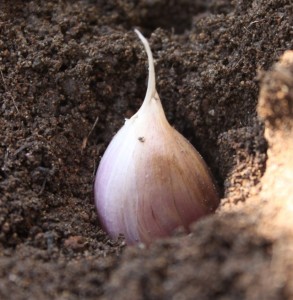
Planting a garlic clove. (Courtesy of MyLittleCity FoodGarden.com)

To plant your garlic cloves, simply place the clove, rootside down (pointy side up) in the soil 2 inches, cover with soil, and then cover again with at least 6” of mulch. The added mulch will ensure that your crop has adequate moisture, protection from the elements, and a stable temperature to grow in.

II – Choosing a Variety

Now for the fun part! Firstly, I’d say, choose a couple different varieties so you can see the differences in how they grow, their yield, and most importantly, of all, their flavor!

There are two different types of garlic. Hardneck and softneck.

A variety of Hardneck Garlic  - German Red - Rocambole (Rasa Creek Farm)
A variety of Hardneck Garlic – German Red – Rocambole (Rasa Creek Farm)

Hardneck Garlic

Hardneck are so called because… they have a hard neck!

Hardnecks are the … HARDier of the two. So, they are often more popular with more challenging growing climates of northern latitudes.

While hardnecks generally yield fewer clovers per bulb, the cloves themselves are bigger. Ah, the classic quandry, more versus bigger.

In the hardneck garlic family, there are 9 sub-types to choose from:

These varieties are known for their over the top flavors ranging from inferno-esque heat (Georgian Fire), all the way to the sweetest of the sweet (purple italian).

A softneck variety of garlic, Red Tock (Forever Yong Farm)

Softneck Garlic

Soft neck are named because of their soft neck. Pretty simple.

The most notable qualities of softneck garlic are their excellent storing qualities. The bulbs are often larger, with more cloves per bulb than their hardneck counterparts. The necks are soft, and thus, easier for braiding.

Some popular varieties of softneck garlic are:

  • California Early
  • Chet’s Italian Red
  • Early Italian Red
  • Inchelium Red
  • Kettle River Giant
  • Nootka Rose
  • Oregon Blue
  • Polish White
  • Red Toch
  • Siciliano
  • Susanville
  • Silver White
  • Transylvanian

III – Maintenance

Garlic, despite repelling vampires, actually struggles in the battle with weeds. The two big challenges that weeds will present to your garlic is: competing for the nutrients in the soil, and competing for sunlight above the ground. Your mission is to make sure that no weeds starve your garlic of nutrients or sunlight.

So, when you see a few competing weeds, feel free to behead them and use them as mulch. Just make sure they haven’t already gone to seed or are prone to rooting their cuttings, because that will just make more weeds that you’ll have to contend with. If that is the case,  you’ll want to hot compost those weeds in order to kill them AND their offspring. If you aren’t setup to hot compost them, go ahead and use them as a mulch somewhere in your yard where it will be ok if you have a bit of “wildness.”  The last resort is to put them in the green bin, but we both know your mama raised you better than to waste good organic matter…

IV – Water

It varies variety by variety, but it is common for garlic to desire 1” of water per week.  How much is 1” of water you ask? Well, a good rule of thumb is to dig your hand about 4” into the mulch (you remembered to mulch, right?) and at that depth, the soil/mulch should have the moisture of a nice chocolate cake. If it’s drier than that, give it more water. If it’s wetter, ease up on the water, and let your cake bake a little longer.

V – Garlic Scapes

A garlic scape in the buff - courtesy of GreenCityMarket.wordpress.com
A garlic scape in the buff – courtesy of GreenCityMarket.wordpress.com

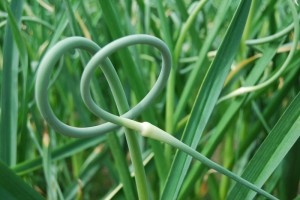
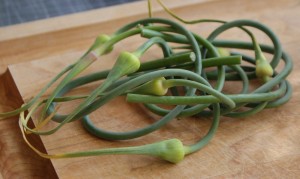
With hardneck garlic, 4-6 weeks before your garlic is mature, scapes will start to appear. These curly-q necks are the flower head forming. Go ahead and give these the Queen Mary treatment. That’s right, cut them off at the base of their scape neck right where they come from off of the plant.

Garlic Scapes ready to be turned into a tasty meal - Image courtesy of DinnerwithJulie.com
Garlic Scapes ready to be turned into a tasty meal – Image courtesy of DinnerwithJulie.com

After you’ve gone through and es scaped (har har) all of your hardneck garlic, you’ll have quite a basket of scapes to deal with. Don’t compost those! Let your body compost them! They are delicious. In fact, here’s a list of incredible scape recipes.


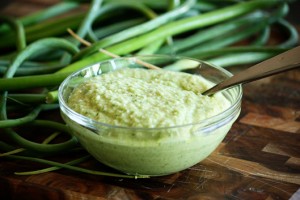
Garlic Scape Pesto (Image courtesy of unsophisticook.com)


Garlic Scape Recipes

Spinach, Pea, and Garlic Scape Soup  (Dinner with Julie)

Garlic Scape Pesto (All Recipes)

Grilled Garlic Scapes with Black Pepper + Sea Salt (With Food and Love)

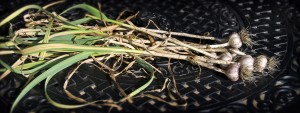
Garlic post harvest (note the brown leaves on the bottom and the green leaves on top. (Image courtesy of thelittlegsp.com)

VI – When to Harvest

You’ll know it’s time to harvest your garlic when you’re bread is properly buttered… no. It’s time to harvest your garlic when the tops begin to yellow and fall over, before they are completely dry.

Harvesting too late – If you wait until the leaves are entirely brown there will be less protection for the bulb.

Harvesting too soon – However, if you’re early to harvest, the cloves will start to separate creating a bulb that won’t store as long.

Harvesting at the right time – The ideal time to harvest is when the lower half of the leaves turn brown and the top leaves are still green. In many northern hemisphere climates, this is around mid-late July.


VII – How to harvest

There are plenty of right ways to harvest, and just one big fat wrong way. Whatever you do, make sure you don’t pull a rookie move and try to harvest by pulling from the above ground stems. You’ll break off the top stem, and expose your garlic top to drying out.

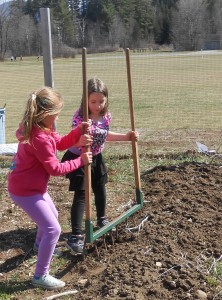
Elementary school girls demonstrating use of the broadfork... child labor at its finest.
Elementary school girls demonstrating use of the broadfork… child labor at its finest.

The simplest method is to use a broadfork to get the teeth right underneath the bulbs and loosen the soil. After loosening all of your garlic bulbs, follow back through picking the garlic from the soil and placing them in your tote.

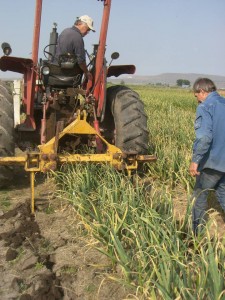
The Garlic Lifter (image courtesy of John Dey)


The Garlic Lifter in Progress (image courtesy of John Dey)

A more sophisticated method that some of our growers use, involves the use of a “cutter” or “lifter.” These tools, often homemade, are dragged behind a tractor in line with the beds and used to loosen the soil, and pop the garlic up. A setup like this is practically essential for anyone harvesting more than 1 acre of garlic.

Curing Garlic at Home – (Image courtesy of Subsistence Pattern Food Garden)

VIII – How to Dry and Store Garlic

Now that you’ve harvested your goal is to get your garlic dried out completely before it gets wet.. Our garlic seed growers’ scariest time  of the season is immediately after they’ve harvested their garlic. If the rain comes and gets their garlic it can ruin their entire crop!

To dry your crop adequately, you’ll want to dry it upside down until it is completely dry. This is often about 2-4 weeks depending on the humidity and presence of a nice dry wind.

Your goal in storing your garlic crop, as well as life… is to just keep it cool. Man.

Well actually, cool isn’t quite enough. You want to keep it:

  • cool
  • dry
  • and dark.

So, maybe not exactly like life. Unless you’re a bat…

Here are a few different ways that people store their garlic.

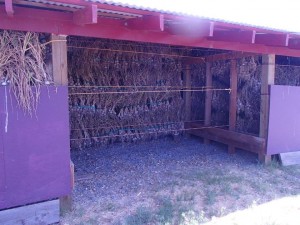
John Dey's setup for curing and storing his garlic. Image courtesy of BigJohnsGarden.com
John Dey’s setup for curing and storing his garlic. Image courtesy of BigJohnsGarden.com


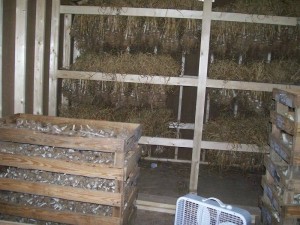
Another view of John Dey's setup for curing garlic. Image courtesy of BigJohnsGarden.com
Another view of John Dey’s setup for curing garlic. Image courtesy of BigJohnsGarden.com


Another garlic curing rack. Courtesy of Natalie Jones Foster


X-  A Timeline of Growing Garlic

September – November -After your first frost, plant your garlic

Winter – leave it be

Spring – Weed as they come up. The more mulch you have, the less weeding you’ll need to do, and the easier it will be

Spring (Optional)– If you forgot to plant your garlic last september, don’t sweat it, you can still plant your garlic this spring and everything will be ok. The bulbs you harvest will be a bit smaller, but it sure beats no garlic!

Early-mid June – Watch for your garlic scapes. Cut them off and eat those tasty things! (See the recipe links below)

Mid – Late July – Harvest and start curing your garlic crop!

Mid- August – After your garlic is properly cured, store it in a cool, dry place until you’re ready to eat it or share with your friends.

September – November – Plant your favorite garlic bulbs remembering that the size of the clove you plant will be comparable to the size of the bulb you harvest next year.


There you have it, you’re all ready to grow some garlic. Now, it’s time to get some seed directly from one of our growers. Click the link below to choose your variety

Find your Garlic Seed